SEQUENCE FOR REPLACEMENT
Having had a spare gearbox re-conditioned I thought it was time to try it out. I like to test all major items carried as spares with the car, that way you know they will work when needed. I hope not to teach anyone to suck eggs but will include a fair bit of detail to help newcomers to the Austin Ruby.
Tools required; Working lamp. Newspaper. Rags.
Spanners: Two 3/16W. Two ¼W. Two 5/16W. One 5/8W.
Clutch plate for aligning.
When referring to nuts and bolts, I include washers as appropriate.
Drain the gearbox. Remove all mats, carpets and the rubber tunnel cover, store in a safe place. Remove the ten screws (PHOTO 1) that retain the two floor panels in place. Retain them in a container that keeps them in the position they have come from. I use a cardboard box with suitable holes punched in. This is necessary as mine are odd lengths and have various washers that have bedded into the floor panels.
Remove gear stick by unscrewing the collar under the gear shift pattern dome. Remove lower floor panel, taking care not to scratch the paint! In my case I taped the hand brake lever handle to the lever to facilitate getting the hand brake lever boot and floor panel off in one piece. Remove brake and clutch pedals. Remove upper floor pan. Refit the pedal retaining nuts and bolts to the levers for safekeeping. Disconnect the speedometer cable from the gearbox and speedometer; take this opportunity to give it a good look over and lubrication.
Place a fairly thick layer of newspaper on the radius arms and brake cross shaft. This is to provide a safe platform for lowering the prop shaft and gearbox onto later. Remove the four nuts and bolts (note cutaway heads) connecting the Hardy Spicer joint to the gearbox, support the prop shaft and slide to the rear. If needing to move the car at any time support the prop shaft in a cord sling with a bit of wood spread over the tunnel. It can then rotate safely. (Photo 2)
Remove the near side bracket that holds the body to the chassis (PHOTO 3), three bolts to chassis and one to the body, retain any packing piece found. Re-fit the gear lever, remove the eight nuts holding the gear box to the crankcase. Protect the floor in front of the passenger seat, that is where the gearbox will end up, I used newspaper again.
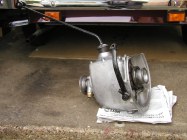
Lower the prop shaft onto the brake cross shaft. Sit in the middle of the two front seats. Using the gear lever as a handle slide and rock the gearbox to the rear, expect the weight to come on. Lower onto the radius arms. You can now swing the gearbox onto the floor in front of the passenger seat using the gear lever as a handle. Watch out for grease and oil as the gearbox has come from a very dirty place, on our car at least. Lift the gearbox out of the car.
Now is the time to clean up this usually inaccessible area and do any tasks that come to light? I replaced the bolt and spring set on the radius arm anchorage (PHOTO 4) (I have since changed the nut to self locking) and adjusted the hourglass in the steering box. These two items went a long way to reducing steering wander.
Before fitting the reconditioned gearbox check the speedometer cable fits the fitting on the gearbox, the threads are fine and easily damaged. Tape the speedometer fitting threads to prevent damage when fitting, also check all the huts and bolts are tight on the gearbox. Check the oil filler plug is not too tight, easier when off the car than when on it. Fit the gear stick if not fitted and align the gearbox master spline to the top. This is most important to ensure an easy fit later on. I used an old clutch drive plate to make this easier. Also align the crankshaft master spline to the top.
Lift the gearbox into the car nearside floor, I then sat in the middle of the two seats and lifted the gearbox into the gap behind the flywheel. The gearbox can then be lifted onto the studs on the crankcase, locating the top two first, if your splines are aligned the gearbox will slide onto the studs, just like that. In my case I had to re-align the splines two or three times and started fresh again next day, it went on smoothly then. Fit and tighten the eight nuts to the studs. Fit the speedometer cable to the gearbox and speedometer.
Fit the clutch pedal temporarily and check the arm ends up about a quarter of an inch away from the crankcase when the clutch is full disengaged. This clearance can be adjusted by slackening the bolt at the base of the clutch lever and manipulating the lever. Without the floor panels fitted the pedal can come well into the car, but is held in the correct position when the floor is fitted.
Fill the gearbox up to the bottom of the filler hole with engine oil and fit the plug. Re connect the prop shaft and grease the splines if required.
All that remains is, to fit all the panels and carpets in reverse order, then road test.


